
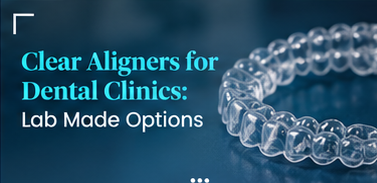
Clear aligners are now one of the first things patients ask about when they sit in the chair. They’ve seen the adverts, they’ve heard about a friend’s result, and they want straighter teeth without metal brackets. For clinics, that demand is a real opportunity. The problem is that sending every case to a big brand system eats into the margin on every single patient, and it puts part of the treatment plan in someone else’s hands.
There’s another route. A local dental lab can design and produce aligners for the right cases, while you stay in full control of diagnosis and planning. At Swift Lab, our dental laboratory in Ras Al Khaimah produces aligners alongside retainers and a full range of orthodontic appliances for clinics across the UAE. Many of your patients will already understand the advantages of removable appliances, which makes aligners an easy conversation.
This guide covers how lab-made aligners work, which cases they suit, where brand systems still earn their fee, and how to run your first case with confidence.
Why More Clinics Are Choosing Lab-Made Clear Aligners?
Brand name systems are excellent products with strong software and clinical support. But clinics feel three pressures on almost every case.
The cost per case
A brand system charges a significant fee per case, and it’s often the same whether the patient needs ten stages or forty. For a mild relapse or a small pre-restorative correction, that fee can make the treatment hard to justify to the patient, or leave very little margin for the clinic.
Control over the plan
With some systems, much of the setup happens out of sight. You approve a plan, but changing it can feel like negotiating with software. With a local lab, you speak directly to the technician who built the setup.
Speed of refinements
When tracking slips, you want a refinement fast. Local production means shorter lead times and less waiting between appointments.
Which Cases Suit Lab-Made Clear Aligners
Case selection decides success more than any other factor. Aligners of any kind do some movements beautifully and struggle with others.
Ideal candidates
The best cases involve modest, predictable movements:
- Mild to moderate crowding or spacing
- Relapse after previous orthodontic treatment
- Minor alignment before veneers, crowns or implants
- Small midline or arch form corrections
Why pre-restorative alignment is so valuable
Moving a tooth even one or two millimetres can completely change a restorative plan. A rotated or proclined tooth that would need aggressive reduction for a veneer might need almost none after a short course of aligners. That’s better dentistry, and patients appreciate being told their teeth can be saved rather than cut.
Cases to refer or treat with a full system
Some movements are difficult for any aligner and need more experience, auxiliaries, or a specialist:
- Significant skeletal discrepancies
- Large rotations of rounded teeth such as lower premolars
- Big extrusions
- Substantial bodily movement or root torque
- Complex extraction cases
If a case feels borderline, treat that feeling as the answer. Refer it, or use a system with more clinical support.
How the Lab Made Aligner Workflow Runs
Once the case is selected, the process has four clear stages.
Step 1: Records
We need full arch intraoral scans or accurate impressions of both arches, a bite registration, and a standard photo series. Capture the full dentition, including the distal surfaces of the last molars, because missing detail there affects how the aligner seats.
Step 2: The digital setup
Our technicians build a digital setup that moves each tooth to its target position in small stages. The setup also proposes attachments and interproximal reduction where they’re needed.
What to check before you approve
Look closely at four things before approving any setup:
- Movement per stage. Small increments track better than large ones.
- Attachment placement. Rotations, extrusions and root movements usually need attachments.
- IPR amount and location. Make sure it’s clinically safe and where you expect it.
- Final occlusion. Check the bite at the end, not just the alignment.
You’re the clinician. If anything doesn’t look right, ask for a change. That conversation is one of the biggest advantages of working with a local lab.
Step 3: Production
Once you approve, we 3D print a model for each stage and thermoform the aligners over them. They’re trimmed, polished, labelled and packed in stage order, together with an attachment template.
Step 4: Delivery and monitoring
You bond the attachments, carry out IPR as planned, and review the patient at regular intervals. If an aligner stops seating properly, a new scan lets us produce a refinement quickly.
Getting Attachments and IPR Right
Attachments and IPR are where many aligner cases succeed or fail, whichever system you use.
Attachments
Attachments are small composite shapes bonded to the teeth. They give the aligner something to push against, which is essential for rotations, extrusions and root movements.
Bonding tips
- Use the template exactly as supplied
- Keep the tooth surface clean and isolated
- Fill the template wells completely to avoid voids
- Remove excess composite around the attachment before curing
A poorly formed attachment is one of the most common reasons aligners stop tracking.
Interproximal reduction
IPR creates space by removing small, controlled amounts of enamel between teeth. It’s often a more conservative option than expanding the arch or extracting. Measure as you go with a gauge, and don’t exceed the planned amount.
Retention Is Part of the Treatment
Teeth want to move back. Every aligner case ends with retention, and patients should understand that from the very first consultation. Plan retainers from the final stage of the setup so they fit the finished result exactly. Clear removable retainers are the most popular choice after aligner treatment, while fixed retainers suit some lower anterior cases.
Share our guide to caring for removable orthodontic appliances with patients, because a retainer that’s cleaned and stored properly lasts much longer.
Clinical Responsibility and Patient Communication
With lab-made clear aligners, diagnosis and treatment planning stay with you. The lab provides the technical setup and production, but you approve the plan and manage the patient. For many clinicians, that’s exactly the appeal.
Setting expectations with patients
Tell patients clearly how many hours a day they need to wear aligners (typically around 20 to 22), how often they’ll switch to a new set, and what happens if they don’t wear them. Compliance is the patient’s part of the result, and saying so early prevents frustration later.
Lab-made vs Brand Systems at a Glance
| Factor | Lab-made aligners | Brand systems |
|---|---|---|
| Best for | Mild to moderate cases | Mild to complex cases |
| Cost per case | Lower, scales with stages | Higher, often fixed |
| Control of setup | Direct with technicians | Through the system’s software |
| Refinements | Fast, local | Depends on the system |
| Clinical support tools | Lab guidance | Extensive |
Frequently Asked Questions
Can general dentists offer clear aligners?
Yes, for appropriate cases and with proper training. Start with simple cases, such as mild relapse or small spacing, and build experience from there.
How many aligners does a case need?
It depends entirely on the movements. Mild cases may need only a small number of stages, while moderate cases need more. The setup will show the exact count before you approve.
Are lab-made clear aligners as good as brand systems?
For mild to moderate cases, lab-made aligners can achieve excellent results. Complex cases benefit from the clinical tools and support larger systems provide.
What records does the lab need?
Full arch scans or impressions of both arches, a bite registration, and a photo series.
How long does production take?
It depends on the number of stages. Contact our team for current timelines on your case.
Conclusion: Start Small and Build Confidence
Lab-made clear aligners give clinics a flexible, economical way to treat mild to moderate cases while keeping full control of every plan. Choose cases carefully, check each setup properly, and plan retention from day one. If you’d like to run your first case, the Swift Lab team is happy to walk you through records, setup, and delivery.