
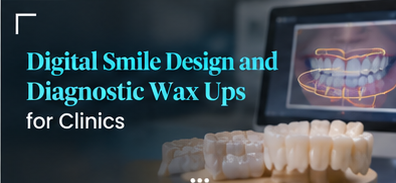
Patients don’t buy veneers. They buy the smile they imagine, and until they can actually see it, a big treatment plan is a leap of faith. Digital smile design closes that gap. It lets patients see their new smile on their own face, and then feel it in their mouth with a mock up, before a single tooth is prepared.
The design also decides which materials you’ll use. Our comparison of zirconia vs E-max and our guide to porcelain vs zirconia crowns help you choose once the plan is set. And if you’re looking for a lab to partner with on aesthetic cases, our dental laboratory in Ras Al Khaimah serves clinics across the UAE.
Here’s the five step workflow, what each step needs, and why it pays off.
Why Digital Smile Design Changes the Conversation
It builds trust
When patients see a realistic preview on their own photo, they stop worrying about whether they’ll look “fake” and start asking when they can begin.
It aligns the whole team
The dentist, the lab and the patient work from the same plan. There’s no guessing about length, width or midline.
It protects tooth structure
Because preps are guided by the planned result, you remove only what’s needed.
Step 1: Take the Right Records
Everything that follows depends on good records.
Photos
- Full face, smiling broadly
- Full face, at rest
- Retracted, front view
- Close up smile
- A profile view
Photo tips that make a difference
Keep the camera level with the patient’s eyes, use consistent lighting, and make sure the head isn’t tilted. A tilted photo can make a perfectly level smile look crooked in the design.
Video
A short video of the patient speaking and smiling naturally shows how the lips move, which static photos miss. It reveals how much tooth shows at rest and in a full smile.
Scans
Full arch scans of both arches and a bite complete the records.
Step 2: Create the Digital Design
The design is built around the patient’s face, not just the teeth.
Facial references
The designer uses the facial midline, the interpupillary line and the lip line to position the new smile.
Tooth proportions
Central incisor width to length ratio, the progression of tooth sizes from front to back, and the curve of the incisal edges all follow the patient’s features.
Personalising the design
Not every patient wants the same look. Some want a bright, even “Hollywood” smile; others want natural character with slight irregularities. Ask before designing, because this choice affects everything downstream.
Step 3: Build the Diagnostic Wax Up
The two dimensional design becomes a three dimensional plan. The lab creates a digital wax up that adds the planned shape to the patient’s scanned teeth, then prints it as a model.
Why the wax up matters
The wax up is the blueprint for the mock up, the prep guides and ultimately the final restorations. Any change you want should happen here, not later.
Step 4: Place the Mock Up
Using a silicone index made from the wax up, you place a bisacryl mock up directly over the patient’s unprepared teeth.
Let the patient live with it
The patient sees their new smile in the mirror, hears how they speak, and feels the new tooth length. Taking photos of the mock up and letting them show a family member can be powerful.
Adjust before committing
If the patient wants teeth slightly shorter or narrower, adjust the mock up and send the changes to the lab. This is far easier now than after preparation.
A note on additive cases
In additive cases, where teeth need to be built out rather than reduced, the mock up is also the proof that minimal preparation is possible.
Step 5: Prepare Through the Mock Up
With the approved mock up in place, use depth cutting burs to prepare through it. This gives controlled, minimal reduction exactly where the new restorations need space.
Why this keeps preps in enamel
You only remove tooth structure that sits inside the planned restoration’s volume. That keeps veneer preps in enamel, which gives a much stronger bond.
What the Lab Needs for Digital Smile Design
| Item | Why it matters |
|---|---|
| Full photo series | Sets facial references and proportions |
| Video | Shows lip movement and tooth display |
| Scans of both arches and bite | Base for the wax up |
| Patient goals | Shapes the style of the design |
| Shade target | Guides final material choice |
Beyond Veneers
Digital smile design isn’t only for veneers. It’s valuable for anterior crowns, implant cases in the aesthetic zone, orthodontic finishing and full mouth rehabilitation. Any case where the final appearance matters benefits from being designed first.
Frequently Asked Questions
Is digital smile design only for veneers?
No. It helps plan crowns, implants, orthodontic finishing and full rehabilitation cases.
Can a mock up be done without preparing teeth?
Yes. In additive cases, the mock up is placed directly over unprepared teeth.
How long does the mock up last?
It’s a trial, usually worn for a short period to evaluate appearance and function.
What does the lab need to start?
A photo series, a short video, scans of both arches with a bite, and the patient’s goals.
Conclusion: Show the Result First
Digital smile design turns a hard sell into an easy decision, because patients see and feel the result before committing. Take good records, design around the face, test with a mock up, and prep through it. Swift Lab can support your aesthetic cases from wax up to final restorations.